The following borrows heavily from the well-documented article on the same topic at wordpress.com. For more experienced users, and as a reference for the future, i’ve decided to shorten it up a bit.
1. Download and Install MAMP
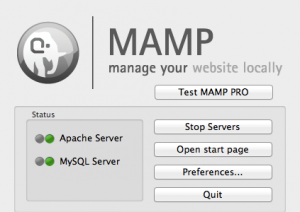
Download and Install MAMP on your Mac, and Configure it to point at your “/Sites/” Directory. Use the link above for more details on this step. You should be able to navigate to “http://localhost:8888/” in your browser, and be presented with the files and folders in your “/Sites/” directory.
2. Download & Place WordPress Files
Download the newest version of WordPress at WordPress.org. Unzip the contents, rename the folder, and place it in your “Sites” Directory. This will be your Site, the WordPress Root. Dont move this around, it’s just like on a server, and talks to the SQL server running with MAMP and the Database for this installation.
3. Configure Database
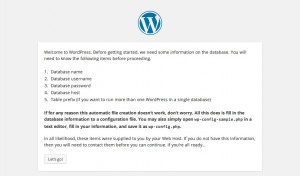
Navigate to your Site – WordPress folder in your browser (make sure MAMP Servers are Running) eg: “http://imagiinate.com/ – and follow the prompts.
3. Database & MYSQL Continued..
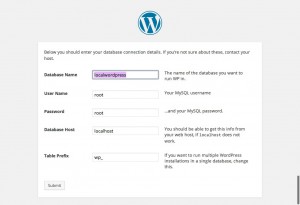
Use “root” for SQL Username, and “root” again for password. The rest can remain as default. Give a name to your database – I try and use the same as the database, to avoid confusion, no caps, no spaces.
4. Database & MYSQL Continued..
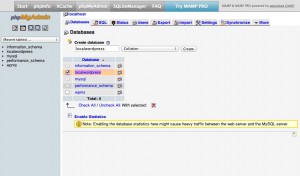
Before Continuing, with the database name you chose in the previous step, enter this same exact name in the field on the MAMP SQL Databases Page, in the “NEW DATABASE” Field. You can leave all options default. Hit “Create”.
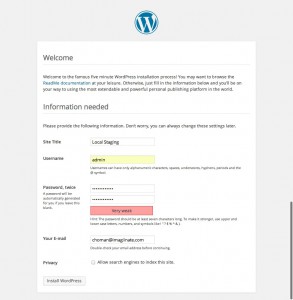
5. Enter Site Title, Username & Email
Go back to your browser/ WordPress Installation Page, and click continue, now with the database having been created in the last step. You should now be presented with the Wordpress settings screen, to name your site and choose an email/password for admin. Continue on to the next step, and you can log into wordpress using the credentials you have supplied.


